Video Cuttervideo-cutter
Choose the start and end of your MP3, preview the selected section, and export the clip you need.
Before You Start
Consideration
• What to Check
Supported Video Formats
Check the tool’s listed input formats and file-size limit before uploading. File compatibility may also depend on the video’s codec.
Clip Selection
Identify where the segment should begin and end. Keep enough context for viewers to follow the action, dialogue, or explanation.
Trimming Scope
Use the video cutter to shorten a recording by selecting the portion you want to keep. Resizing video dimensions and converting file formats are separate tasks.
Preview and Export
Preview the selected segment before exporting. After downloading, check that the clip contains the intended footage and plays as expected.
Upload Your Video
Drag and drop your video into the upload area. The tool displays a maximum file size of
300 MB and lists supported formats, including MP4, MPEG, MPG, and OGV. Check the displayed requirements before uploading your file.
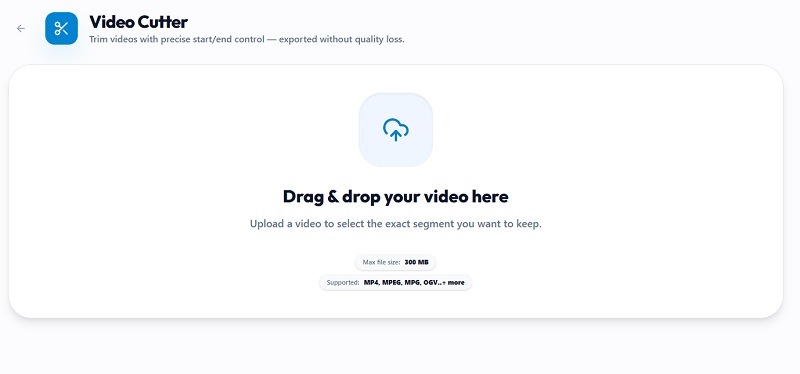
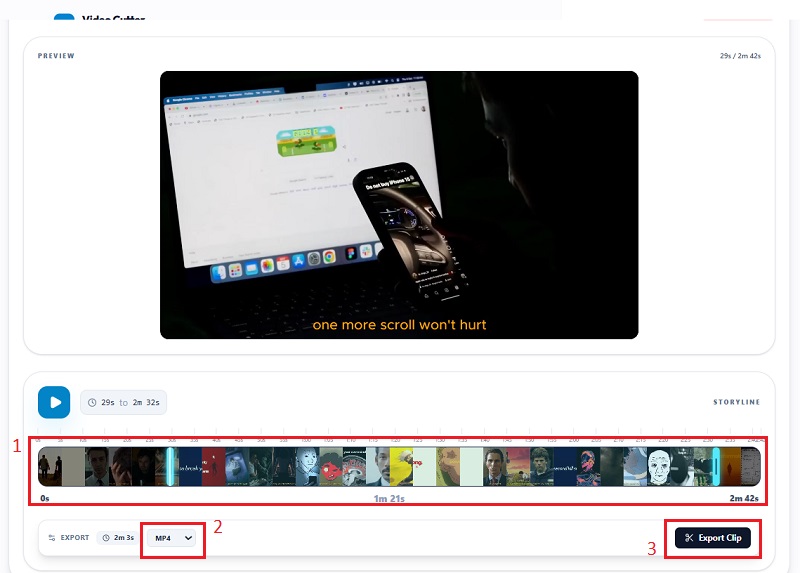
Select the Segment and Output Format
Use the timeline to select the portion of the video you want to keep by adjusting the start and end points. Preview the selected segment to make sure it includes the intended footage. Then, use the output-format dropdown to choose MP4 or WebM.
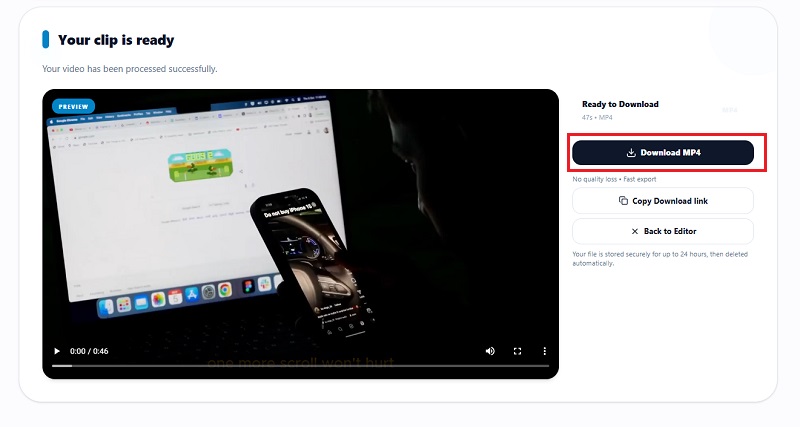
Export and Download Your Clip
Click Export Clip to export the selected segment. When the tool indicates that your clip is ready, review the preview and click the corresponding download button to save the video in your selected format. Finally, open the downloaded file to confirm that it plays as expected and contains the correct segment.
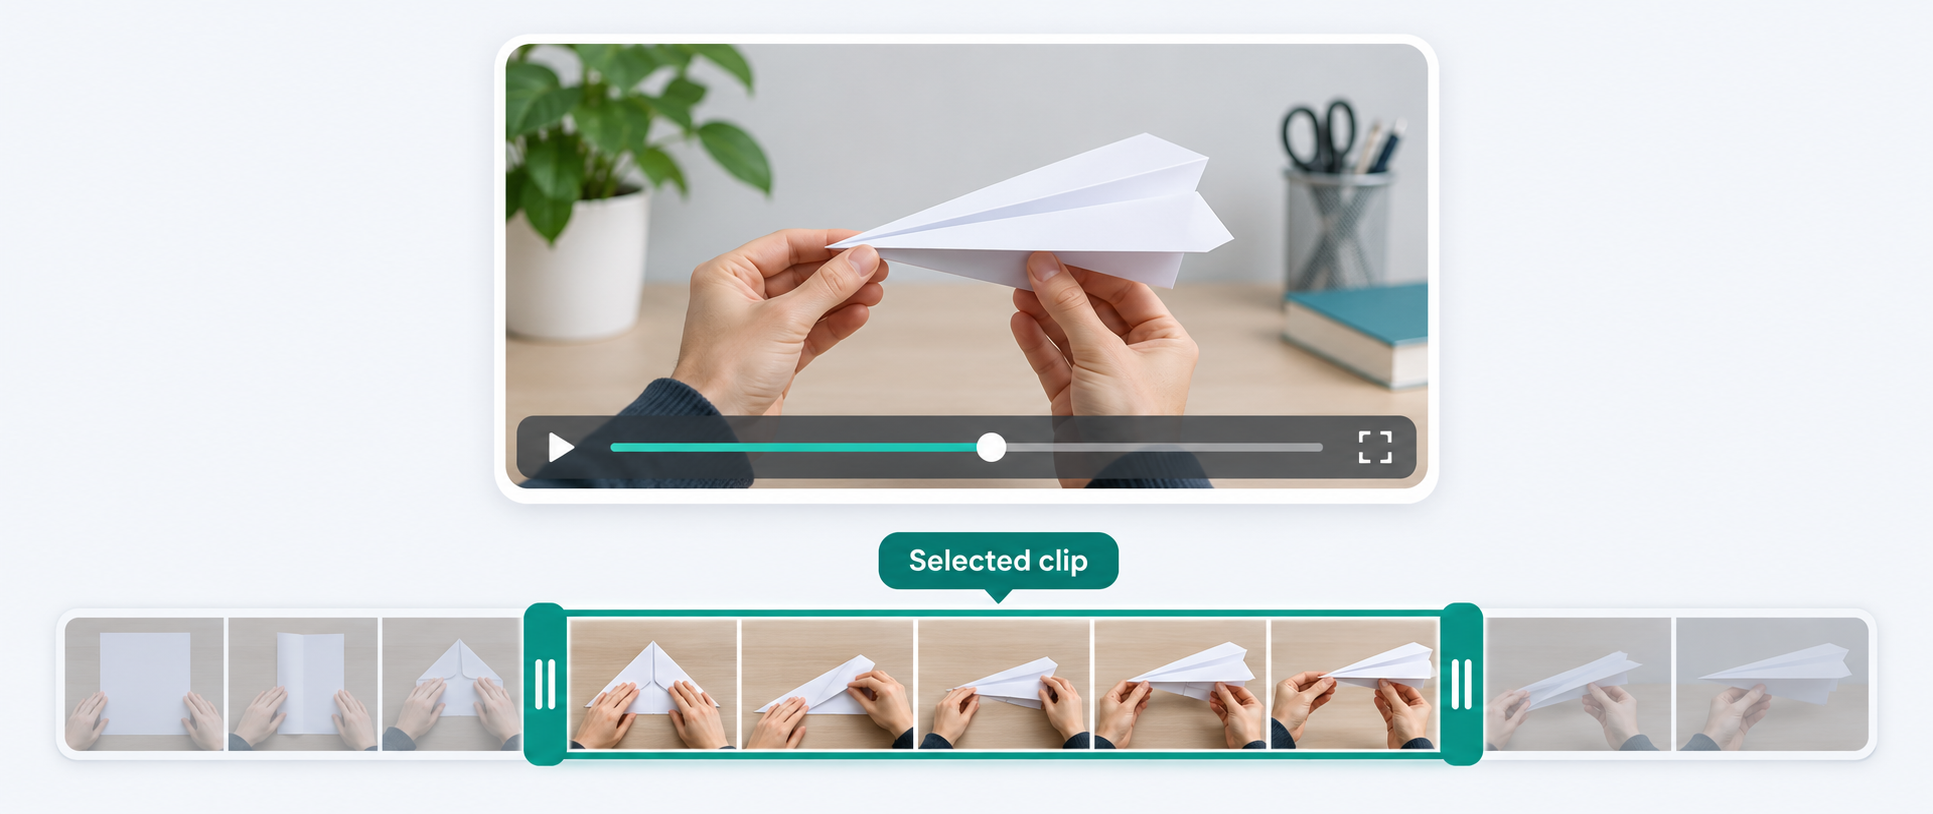
Select the Segment Your Viewers Need
Keep your video focused by selecting the section that serves your main purpose. Use the timeline to choose a relevant moment, such as a key explanation in a lesson or a specific action in a software demonstration. Adjust the start and end points while keeping enough context for viewers to understand the content.
Review Your Clip After Exporting
Previewing your clip in the editor is only part of the process. After exporting, open the downloaded file and check its beginning, ending, and playback. Make sure speech or movement is not cut off and that the clip includes the intended content. This final check helps you confirm that the video is ready for its intended use.
Practical Use Cases
Shorten a Recorded Lesson
Teachers may record an entire lesson but need only a specific explanation or example for students to review. Trimming helps them focus on the relevant section without making learners sit through unrelated footage. The shorter clip can be shared on a learning platform, added to a presentation, or included in digital study materials. Keep enough context around the selected segment so students can follow the explanation without needing the full recording.
Remove Unnecessary Setup From a Software Demo
A software demonstration may include opening an application, navigating menus, or preparing a workspace before reaching the main task. When viewers want to learn a specific feature, this setup can distract from the demonstration. Use Video Cutter to focus the clip on the relevant action while retaining the explanation viewers need to follow along. The finished clip can be embedded in a help article, tutorial, or support guide, making the instructions easier to revisit.
Keep a Short Scene From Your Own Video
A longer personal recording may contain a memorable moment worth sharing on itsown. Trimming lets you keep that scene without sharing the entire video. You can usethe shorter clip in a presentation, share it with friends, or include it in a personal project.Choose a segment that communicates the moment clearly, and check that the cut doesnot interrupt speech or remove context viewers need. Use footage you own or havepermission to share.
Compare Video Containers for Your Clip
MP4, MOV and WebM are containers that can hold video and audio encoded withdifferent codecs. This comparison explains their roles; it is not a list of every inputaccepted by this cutter. For uploading, use a format and encoding supported by the tool.For sharing, check that the exported MP4 or WebM plays in the intended application.
| Type | Container and Codec Considerations | Playback Considerations | Best Use |
|---|---|---|---|
|
MP4
|
A widely used containerthat can hold video and audio encoded with different codecs.Compatibility depends onthe codecs used inside thefile. | Commonly supported bymedia players and platforms, although somecodec combinations maycause playback issues. | Sharing trimmedclips acrosscompatibledevices,websites, andapplications. |
|
MOV
|
A container commonlyassociated with AppleQuickTime workflows. Itcan contain video andaudio encoded with different codecs. | Playback depends on the codecs and the software ordevice being used. Somefiles may require acompatible media player or additional codec support. | Working withrecordings andediting workflowsthat use MOVfiles. |
|
WebM
|
A container designed forweb media that commonlyuses supported video and audio codecs. | Playback depends onbrowser or application support and the codecs used in the file. | Preparing clipsfor websites andplatforms thatsupport WebM. |


