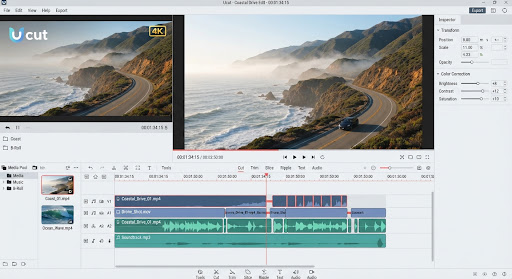
Before you starts
Have the source video ready and decide which section you want to keep. An approximate start and end point will help you make the selection.
Check the selected tool’s file requirements before adding your recording.
How to cut your video step by step
Follow these three practical steps to load, mark, and generate your finalized clip.
1
Add your video
Open Ucut Video Cutter and choose the source video you want to shorten.
Select media file to cut
Drag and drop file here, or browse from computer
2
Set the start and end points
Use the available selection controls to mark the section you want to keep. Check that the start and end points match your intended clip.
Selection: 00:04.170

00:03.420 / 00:15.000
00:03.00
00:06.00
00:09.00
00:12.00
00:15.00
00:02.180
00:06.350
00:04.170
Tip: Check that the clip does not begin or end in the middle of an important sentence or sound.
3
Preview and export your clip
Preview the selected section, then export it and download the result.
Your clip is ready
Duration: 4.17s
14.2 MB
Cut, crop, or resize: which do you need?
| Operation | What changes | Example | Tool |
|---|---|---|---|
|
Cut |
Duration | Keep one section of a recording |
Video Cutter |
|
Crop |
Visible picture area | Remove unwanted edges |
Video Cropper |
|
Resize |
Dimensions or aspect ratio | Adjust the video’s size or frame |
Video Resizer |
Choose cutting when you need a shorter clip. Choose cropping or resizing when the duration is already right but the picture needs adjustment.
Tips for choosing your clip
Leave enough context
Allow a brief pause before the speaker begins or action starts. Cutting too close to an opening word or gesture can feel abrupt and create awkward jump cuts in your final project.
Check the sound at the boundaries
Listen closely to the first and last moments of the selection. Check that speech does not cut off in the middle of a syllable and that background sound transitions smoothly without sudden drop-offs.
Review the exported result
Verify the exported file’s first and last frames before sharing. Playing the clip once from start to finish confirms that the start and end points matched your intended boundaries.
Note: Keeping one continuous section is different from dividing a recording into several separate clips.
If something does not work
| Problem | Suggested action |
|---|---|
| File does not open | Check the tool’s file requirements and confirm that the source file plays correctly. |
| Selected range is invalid | Check that the end point is after the start point. |
| Export fails | Review any displayed error and the tool’s requirements, then retry. |
| Result contains the wrong section | Check the selected boundaries and export again. |
Frequently Asked Questions
Does cutting a video change its dimensions?
No. Cutting changes only the duration (time). The video’s original resolution and aspect ratio remain untouched.
Can I keep just one section of a longer recording?
Yes. Move the start and end markers to frame the section you need; only that selection is exported.
Is cutting the same as splitting?
Cutting isolates one continuous section into a single clip. Splitting divides a recording into multiple separate files.
Will exporting affect video quality?
Output quality depends on the source video and the export settings applied.
Where can I check file-size limits?
Check the selected tool’s stated file requirements before starting.